WireGuard is a new and fresh take on the implementation of a VPN communication protocol. It has no strict “server vs. client” architecture, but rather each peer can be set up to communicate with each other through an encrypted tunnel. The encryption technologies it uses are modern, faster & more efficient than IPsec or OpenVPN. It is also much easier to work with than traditional VPN software.
WireGuard has been incorporated into the Linux 5.6 kernel since 2020, and is gaining adoption widely due to its performance and configuration benefits. In this blog entry, we’ll be setting it up in a traditional VPN server-client setup. More technical information about WireGuard can be found on the WireGuard official website or the Arch Linux wiki entry.
Table of Contents
Architecture Overview
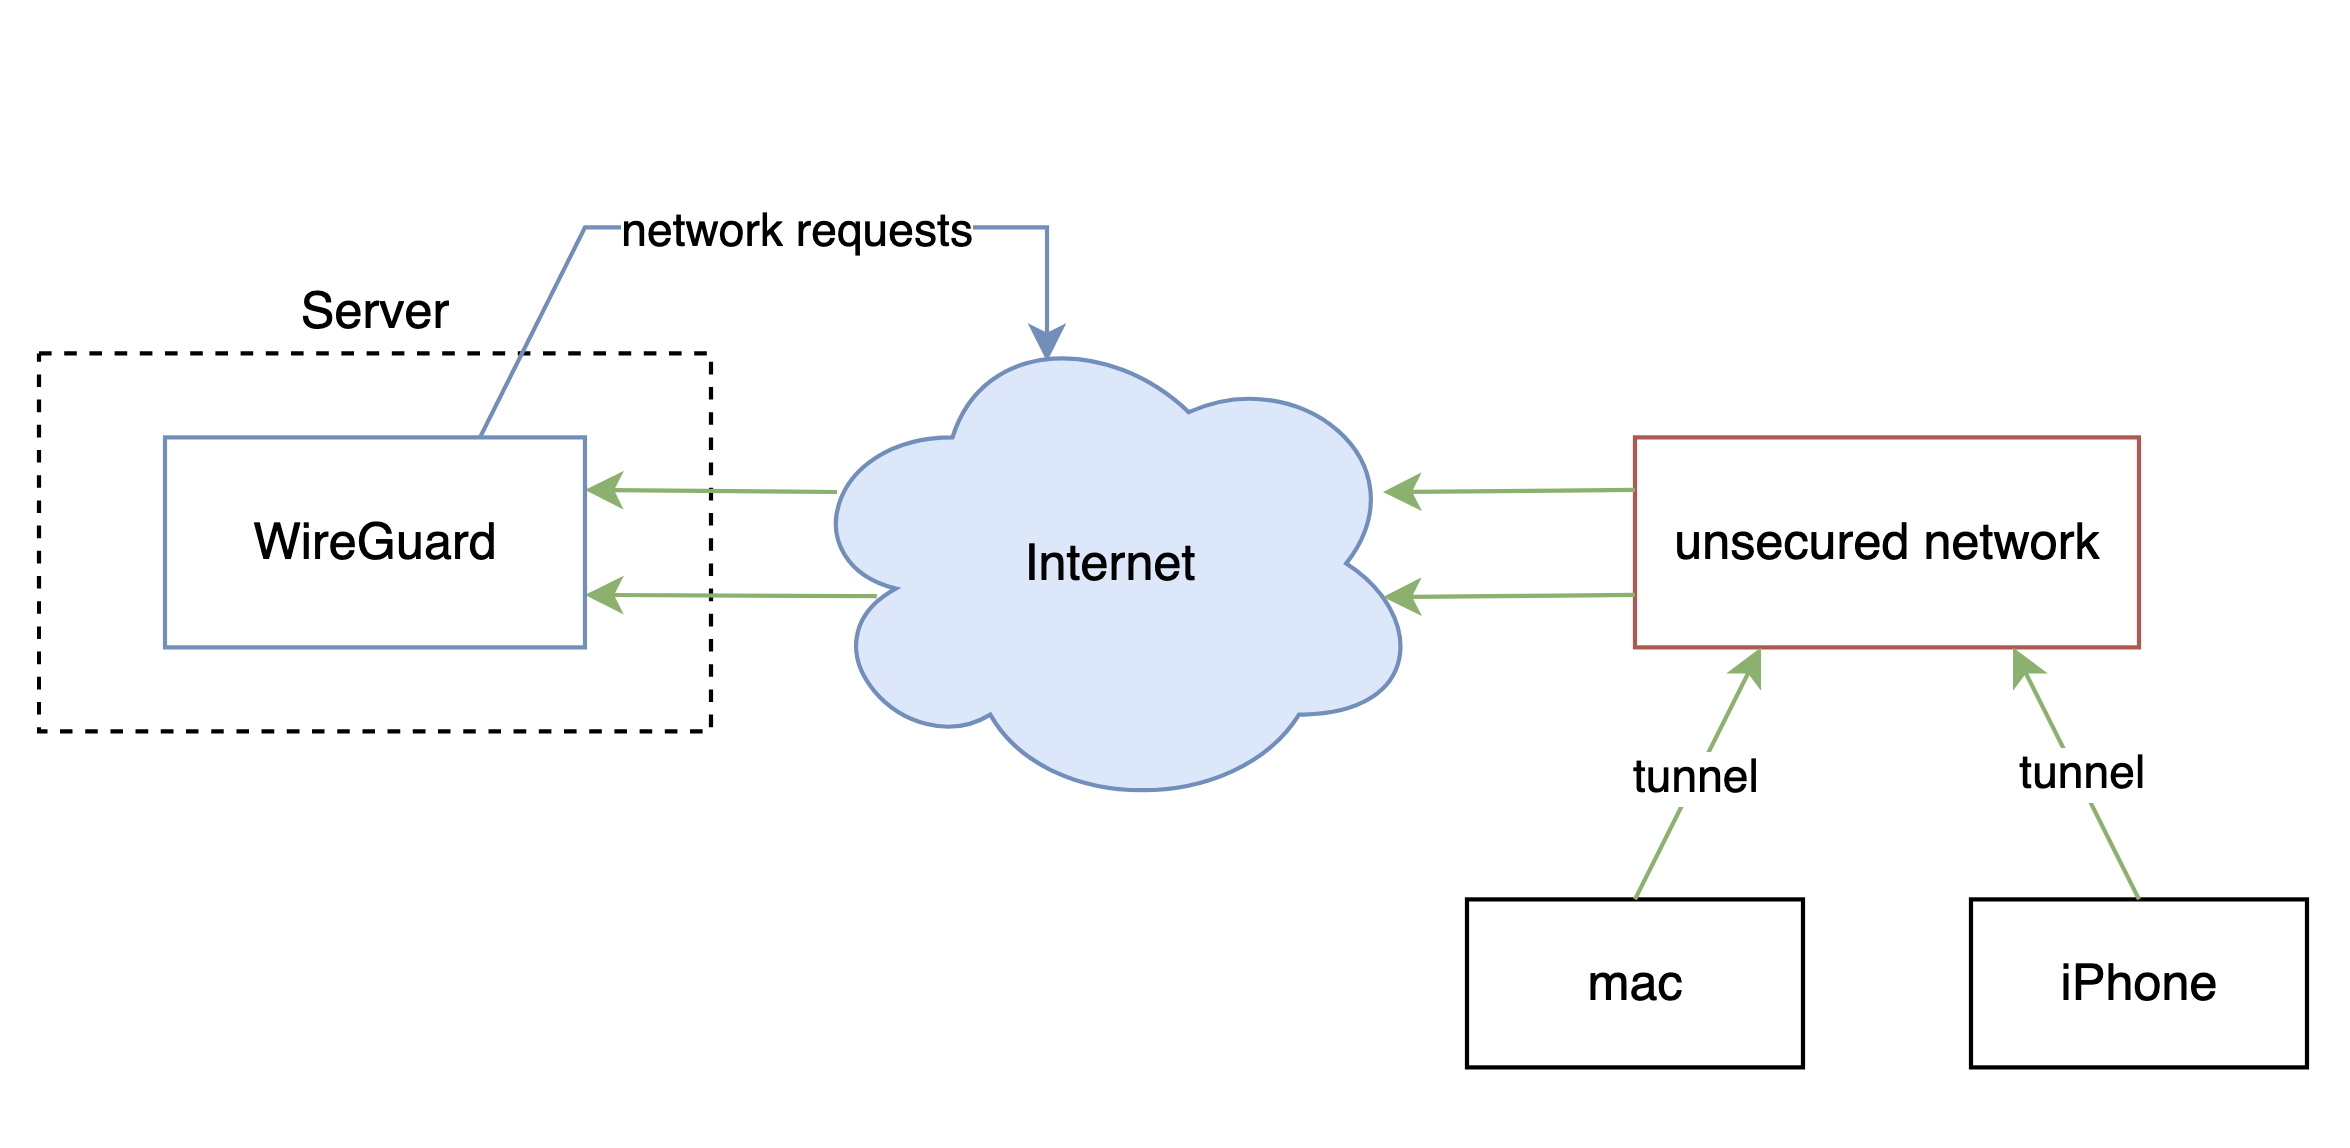
The architecture is a typical server-client VPN setup, where clients tunnel through the internet to a target server and do not interact with each other.
Key Generation
Key generation for each node is identical, whether it acts as a server or a client. I want to tunnel to my home server (hostname is ivymike) through either my iPhone or my mac, so I’ll be creating 3 keypairs. WireGuard is installed on the server with:
$ pacman -S wireguard-tools
First, I’ll generate private keys for all 3 and store the result in a file:
$ (umask 0077; wg genkey > server-ivymike.key)
$ (umask 0077; wg genkey > client-iphone.key)
$ (umask 0077; wg genkey > client-mac.key)
Then, we’ll use the private keys to generate public ones for each node:
$ wg pubkey < server-ivymike.key > server-ivymike.pub
$ wg pubkey < client-iphone.key > client-iphone.pub
$ wg pubkey < client-mac.key > client-mac.pub
Wireguard also includes the option to generate a pre-shared key (PSK) between each pair of nodes that will connect. Since I want to connect my iphone and my mac to the VPN server, there will be 2 pre-shared keys: one between the server and my iphone, and another between the server and my mac.
$ wg genpsk > ivymike-iphone.psk
$ wg genpsk > ivymike-mac.psk
Server Configuration
There are 3 configuration files that need to be set up on the server. The first file is called wg0.conf, and is saved under /etc/wireguard/:
wg0.conf
# wireguard server
[Interface]
Address = 10.200.200.1/24
ListenPort = 51820
PrivateKey = <contents of server-ivymike.key>
PostUp = iptables -A FORWARD -i %i -j ACCEPT; iptables -A FORWARD -o %i -j ACCEPT; iptables -t nat -A POSTROUTING -o eno1 -j MASQUERADE
PostDown = iptables -D FORWARD -i %i -j ACCEPT; iptables -D FORWARD -o %i -j ACCEPT; iptables -t nat -D POSTROUTING -o eno1 -j MASQUERADE

[Peer]
# client-iphone
PublicKey = <contents of client-iphone.pub>
PresharedKey = <contents of ivymike-iphone.psk>
AllowedIPs = 10.200.200.2/32

[Peer]
# client-mac
PublicKey = <contents of client-mac.pub>
PresharedKey = <contents of ivymike-mac.psk>
AllowedIPs = 10.200.200.3/32
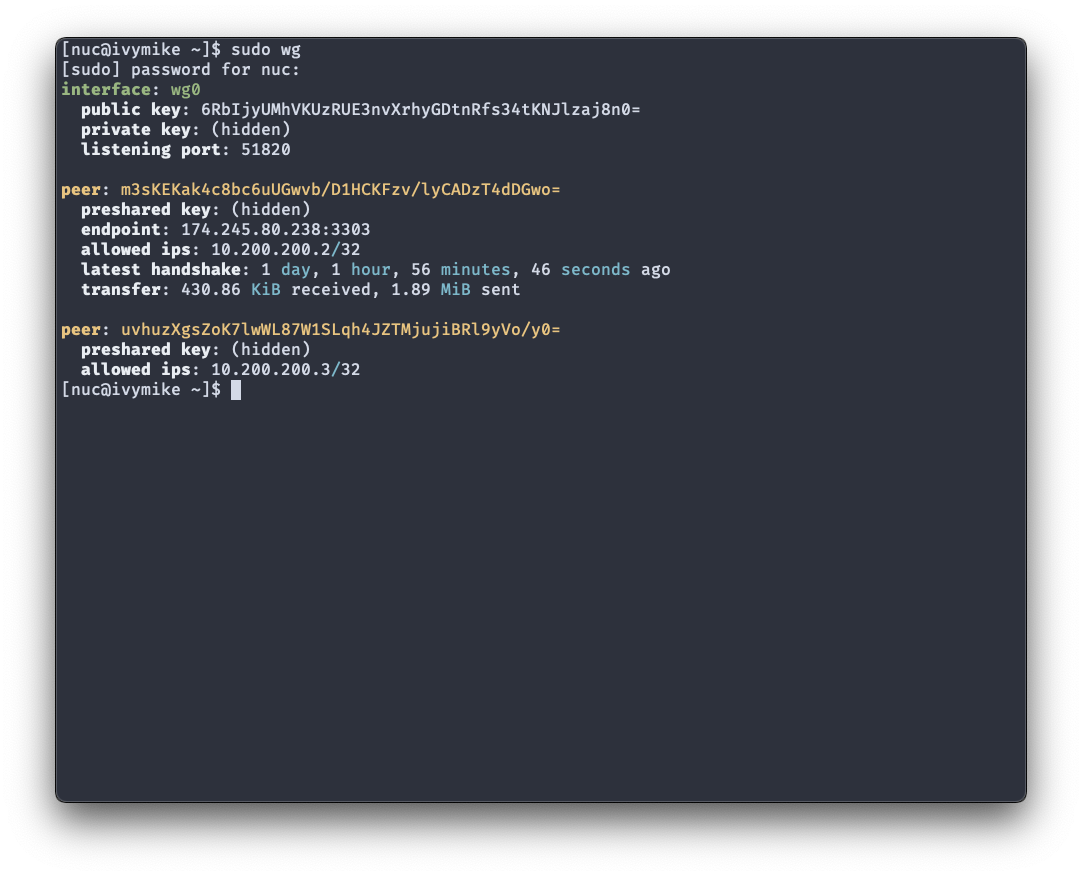
The iptables entries are necessary to set up/take down the routing for the WireGuard interface (wg0). When I had forgotten to add it, WireGuard showed a successful peer connection but no network traffic or DNS resolution. If you don’t want to waste hours debugging, don’t forget it ;).
systemd-networkd has native support for WireGuard interfaces, and I have it set up on my server. The second and third configuration files are to set up the WireGuard interface with it. Both should be saved underneath /etc/systemd/network/:
wg0.netdev
[NetDev]
Name=wg0
Kind=wireguard
Description=WireGuard server

[WireGuard]
ListenPort=51820
PrivateKey=<contents of server-ivymike.key>

[WireGuardPeer]
PublicKey=<contents of client-iphone.pub>
PresharedKey=<contents of ivymike-iphone.psk>
AllowedIPs=10.200.200.2/32

[WireGuardPeer]
PublicKey=<contents of client-mac.pub>
PresharedKey=<contents of ivymike-mac.psk>
AllowedIPs=10.200.200.3/32
wg0.network
[Match]
Name=wg0

[Network]
Address=10.200.200.1/24
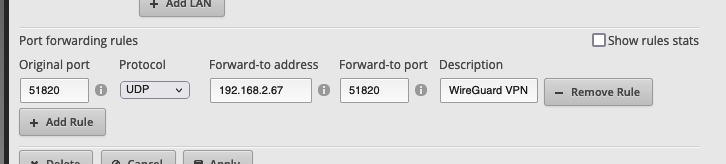
Don’t forget to open up a port on your router to allow UDP traffic for the VPN to your server. I’m running WireGuard traffic over port 51820, and have statically mapped my server to the local IP address 192.168.2.67:
Finally, enable and start the wg-quick service for the wg0 interface:
systemctl enable wg-quick@wg0.service
systemctl start wg-quick@wg0.service
Client Configuration
The clients are configured in a very similar manner, and are even simpler to set up. For reference, I’m using the official WireGuard app available in the iOS store and in the mac store.
iPhone client configuration:
[Interface]
Address = 10.200.200.2/32
PrivateKey = <contents of client-iphone.key>
DNS = 191.168.2.1

[Peer]
PublicKey = <contents of server-ivymike.key>
PresharedKey = <contents of ivymike-iphone.psk>
Endpoint = <your public IP address>:51820
AllowedIPs = 0.0.0.0/0, ::/0
mac client configuration:
[Interface]
Address = 10.200.200.3/32
PrivateKey = <contents of client-mac.key>
DNS = 191.168.2.1

[Peer]
PublicKey = <contents of server-ivymike.key>
PresharedKey = <contents of ivymike-mac.psk>
Endpoint = <your public IP address>:51820
AllowedIPs = 0.0.0.0/0, ::/0
Once the configuration files are done, all that’s left to do is import them in their respective apps. Activate the VPN, and you should be tunneling through your server with no issues! A far cry from the complicated and often finicky IPsec or OpenVPN setup.